
I've been wanting to post pictures of this crochet hat for a while now, and I finally got some pictures together along with a review of the pattern and some tips for anyone who falls in love with this hat too.
This hat was made using the Mindy Beret Pattern by Crochetrend. You can find this pattern & others at her Etsy shop
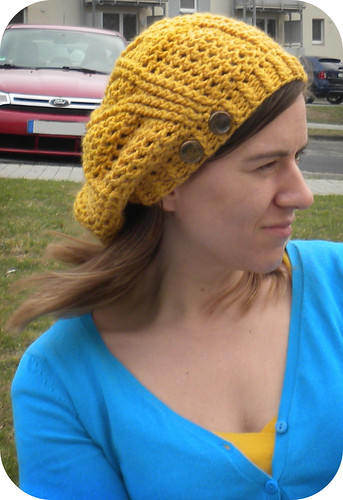
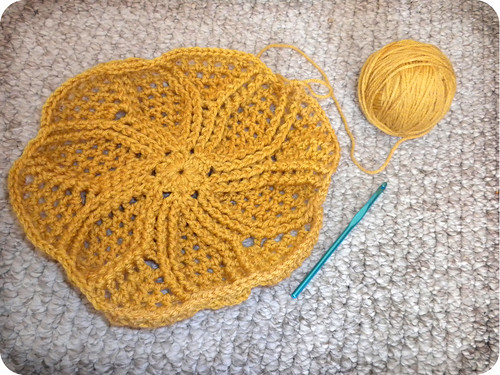
I constructed this hat with an I hook using a worsted weight yarn from Hobby Lobby called "I love this yarn" in sunflower. It is done in the round from the top to the brim as one piece. The stitches are all basic but you'll need to know how to do a Fpdc, Bpdc, and 3 DCs finished together. There are lots of online tutorials that will explain these stitches in detail if you aren't familiar with them.
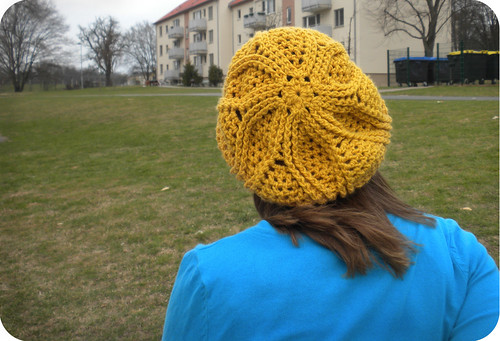
The back of the hat radiates out in forming a very pretty pattern
Tips: There are only two things that I changed when working this pattern. The first was to change how the rounds were joined. Because the first stitch in this pattern is supposed to be a FPDC the pattern says to slip stich around the first chain stitch and then chain 4 so that later it will look like a FPDC ch1. This looks okay, but it is a bit flat compared to the other FPDCs. So, I did a slip stitch into the top of the first FPDC, ch2, then did a regular FPDC around that same first FPDC. This make the first FPDC a tiny bit bulkier than the rest, but it is not noticeable and makes for a cleaner looking join.
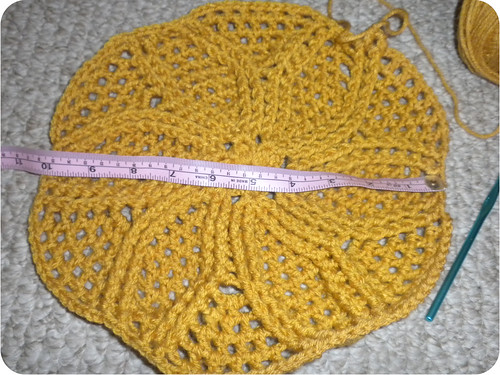
I worked the pattern flat and before I started decreasing it measured 10 inches in diameter.
The pattern gives you two options to finish the brim. One is larger, the other smaller. I wanted to go smaller than both options, so at round 20 I only did 60 stitches. I have a 21.25 inch head size, and I like a more snug fit to my hats so they don't shift. I finished off with two 1 inch buttons, and made a matching scarf to go with my hat.
No comments:
Post a Comment