
I'm thrilled to guest host this month's the HO HO HO and on we sew linky party. It has really helped me to to get motivate to start early on my Christmas and Hanukkah gifts this year, and I hope that you will join me by linking up your Christmas project too.

Every month on the 18th, Paula at Mud, Pies, and pins and Fiona at Celtic Thistle Stitches will be hosting a link party where we can showcase our work and get inspired by each other and the variety of guest hosts that they have lined up. There is also a wonderful giveaway for entering the linky party.
To Add your link click below!
This month's prize was kindly donated to us by Raystitch, http://www.raystitch.co.uk/ It's great little mini Cross Stitch Kit that would be great framed, as a pin cushion or even threaded with a ribbon for a pretty ornament.

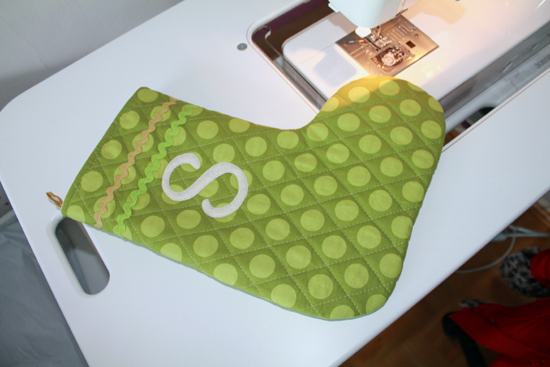
My Project this month is a Super Simple Stocking Tutorial. This pattern is suitable for most beginners with some basic knowledge of sewing and you can download the stocking pattern here. The best part is that it's fat quarter friendly; you only need 2!
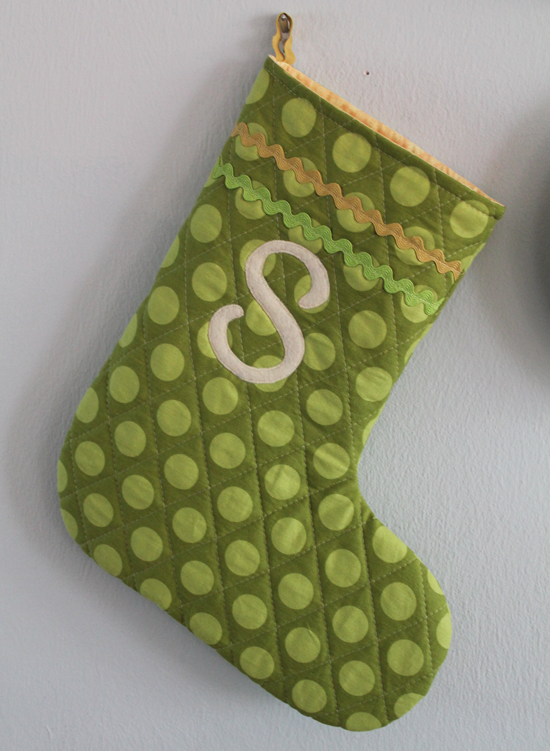
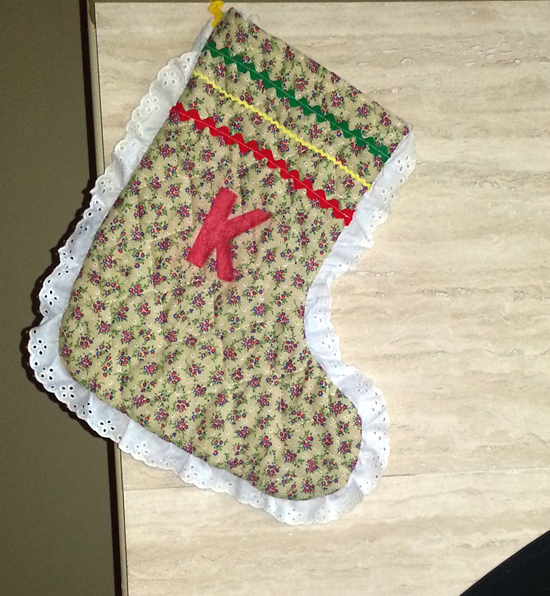
This stocking is based on the set of stockings that my mother made for our family back when I was a little girl. Hers always seemed to be just the right size for most stocking stuffers (not too big that it never seemed full, and not too small where nothing would fit). They were made from pre-quilted calico and rick rack and I've always adored them. My mother was kind enough to fish this one out for me and trace it so that I could share this pattern with you today :)
My version is the same size and shape as the original, but it includes a lining and is quilted by machine instead of using pre-quilted fabric (although you could use pre-quilted fabric if you want). It finishes to around 13h x 11w inches.

The pattern comes in four pieces that you will have to tape together. Make sure to turn the "scale to print" feature OFF!
Supplies You Will Need
2 Fat Quarters (one for the body and one for the lining)
A piece of batting as big as a FQ
A piece of scrap fabric to back your stocking body for quilting (this doesn't show so it can be any cheap fabric that you have on hand)
A scrap of Felt or Fabric for the Initial
Medium Rick Rack for the loop and to trim
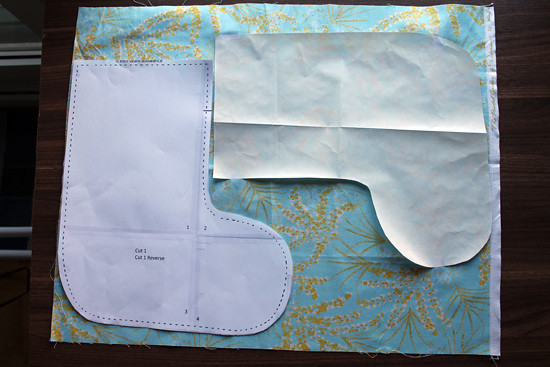
1. Lay your pattern pieces out on your FQs and cut 1 normal and one reverse for both the body fabric and the lining.

2. To add quilting to your stocking you will need to take the body pieces and make a quilt sandwich. I used a piece of cheap muslin for the backing (since the lining will cover this) and a scrap piece of batting for the middle. Lay your body pieces on the top and pin through all three layers.
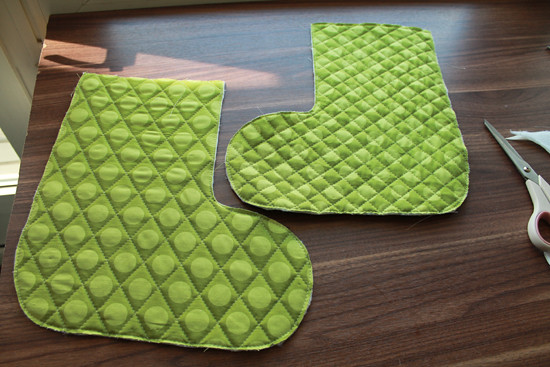
3. Quilt your body pieces using any technique and pattern you desire. I quilted a simple diamond pattern to accentuate the dot design.Cut you quilted body pieces out.

4. If you plan on adding any embellishments such as an initial or trim, now is the time to do it. For an initial, print your letter out to size using your favorite font. If you are going to use a fusible to adhere your letter, make sure to choose the "mirror print" option so that when you flip your letter right-side-up, it is not backwards.
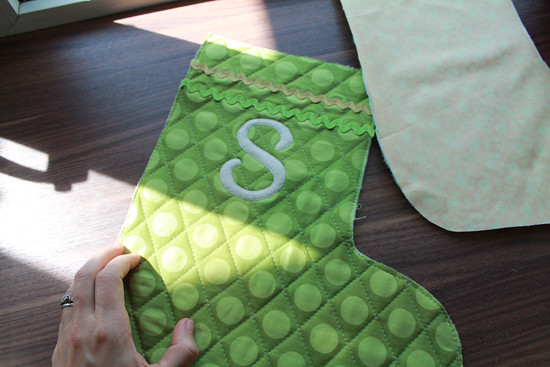
5. Sew down your letter using a zig-zag or straight stitch and sew a straight line through your rick-rack to secure it.

6. Pin your rick-rack loop in place making sure that it is more than 1/4 inch in from the edge so that it doesn't get caught in the seam when you sew the edges.

7. Okay, here's where it gets interesting :) Lay your body fabric and lining fabric right-sides together and sew across the top edge using a 1/4 inch seam allowance. Repeat for both sides.
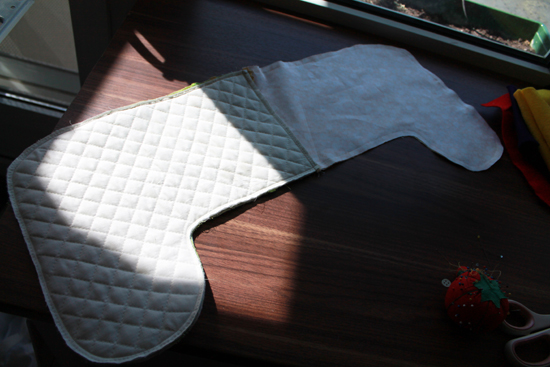
8. Open up your joined pieces and lay the right sides together matching the edges. Sew the body side using your 1/4 inch seam allowance. When sewing the lining side, increase your seam allowance to 1/2 inch so that it fits better when you turn it right-side out. At the bottom of the lining, leave an opening big enough so you can easily invert your stocking.
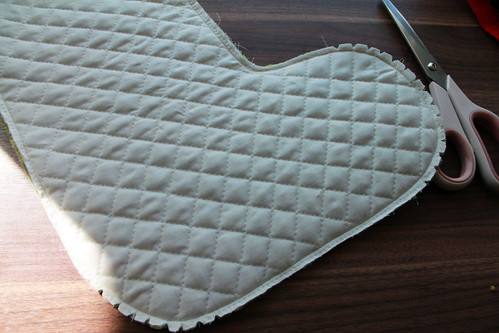
9. Trim the excess seam allowance from your lining fabric side and take a moment to notch your outside curves, and clip your inside curves on both the body and lining. Don't skip this step. Your seams are bulky and wont turn smoothly without a few notches and clips.

10. Reach through the opening that you left in the lining and turn your stocking right side out. Smooth your seems and your curves down from the inside until you are happy with the shape.

11. Fold the seam allowance to the inside of your lining and sew shut. Don't worry about making this invisible. It wont show since it's at the bottom.
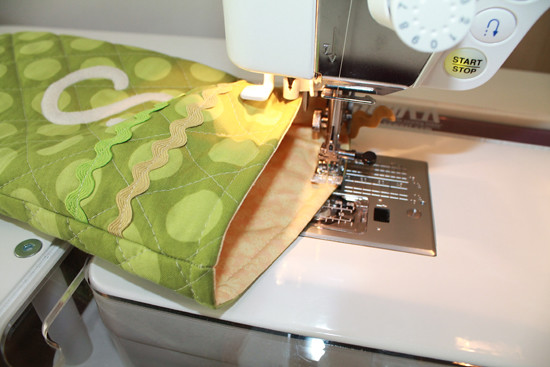
12. Push the lining into your stocking body and maneuver it around until it sits smoothly inside. To give your top edge an added layer of security and finish, top stitch the body and lining together using a generous 1/4 seam.
Now your are all done and your stocking is ready to hang or to give as a gift! I hope that you found this tutorial easy and fun. If you have any questions please feel free to email me.
It's your turn to link up and show us the Christmas project or Christmas gift that you've been working on this month. You have 'till the end of the month to join us and be entered into our lovely give-away!
Click on the link below to enter!
Also, I'd like to thank our sponsors.