
Welcome to the September HO, HO, Ho and On We Sew
link party!
link party!
Let's face it my fellow holiday makers. No matter how talented and crafty we all are, there will inevitably be someone on our holiday list who will get a gift card. Personally, I love gift cards, and I have no problem giving or receiving them. While they are great, they do lack that little handmade touch that many of us love to include in a gift. So to remedy this situation, I will be sharing a fun, fast, and versatile gift card holder/mug rug pattern to kick off the September Linky party.

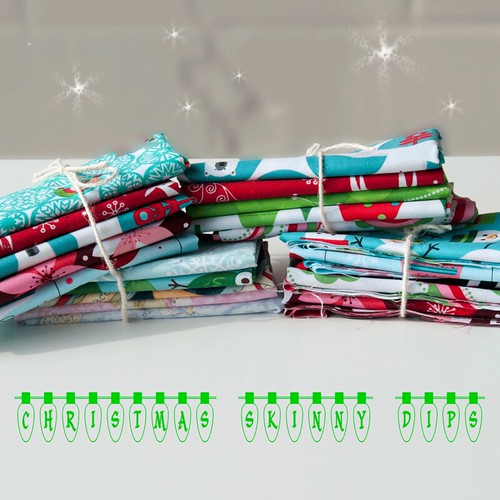
Thank you to Plush Addict for sponsoring this months giveaway prize! One lucky linky party winner gets their choice of one Skinny Dips bundle from Plush Addict. The bundles are a themed set of five fat 8ths of fabric.
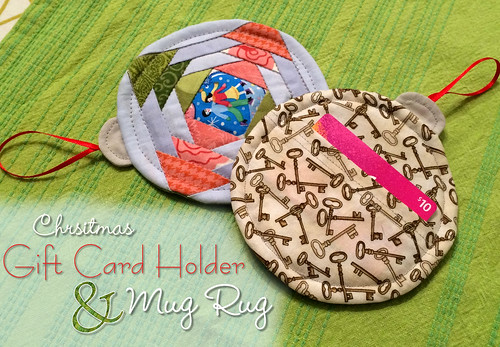
Christmas Gift Card Holder &
Mug Rug Tutorial
While many of the store bought gift card holders available are pretty, they are often for presentation sake only and will eventually find their way to the garbage can. This is sad :(
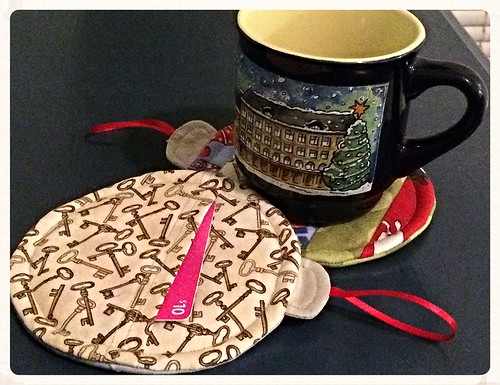
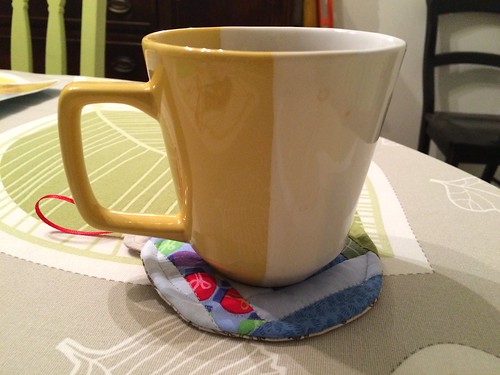
Personally, I like projects that are practical, pretty, and multi-functional. This gift card holder is not just a pretty way to present your gift card, but it doubles as a Christmas ball shaped mug rug that the recipient can use at home or at work. It's also designed to hang on the tree if you like to tuck a few little gifts into the branches of your Christmas tree like I do. Plus, it fits perfectly into an A6 sized envelope for easy mailing.
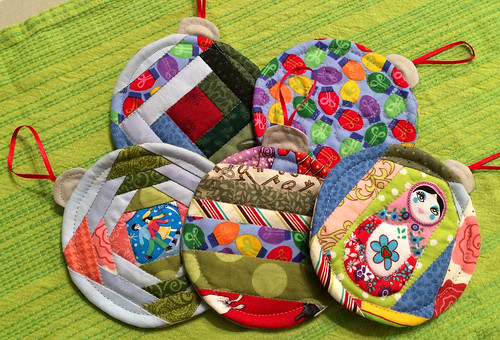
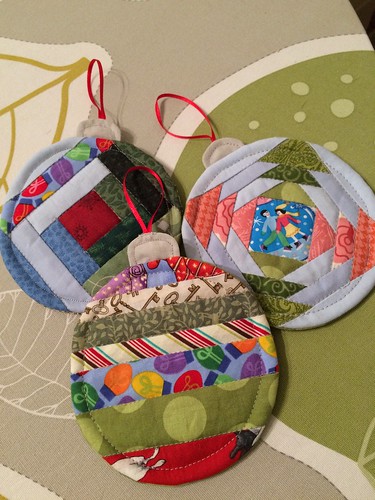
I'm also a big fan of variety, so this pattern includes a one fabric (basic) version, a paper pieced pineapple design, and a paper pieced log cabin as well.
Supplies:
1/8 yard fabric or a variety of fabric scrapsbatting
thread
1/8th inch ribbon for hanging
optional trim for embellishments
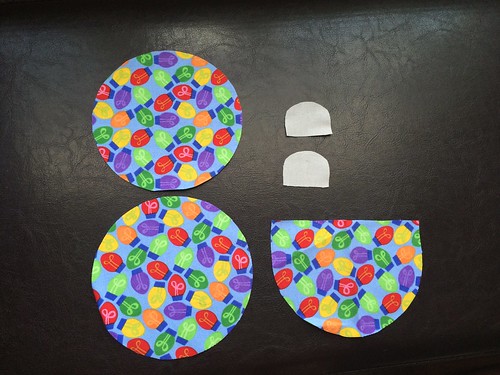
No matter which design you choose to make, you will start by printing the basic pattern and cutting out the shapes for the body (front and back for the basic pattern, only back if patchwork), the pocket, and the cap.
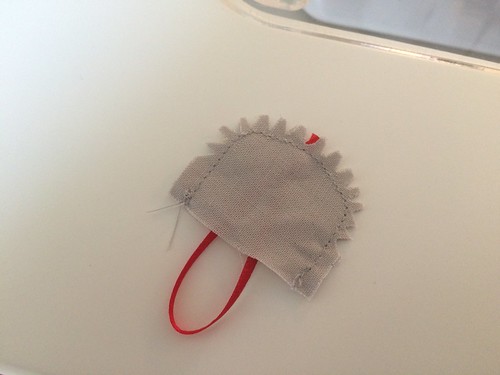
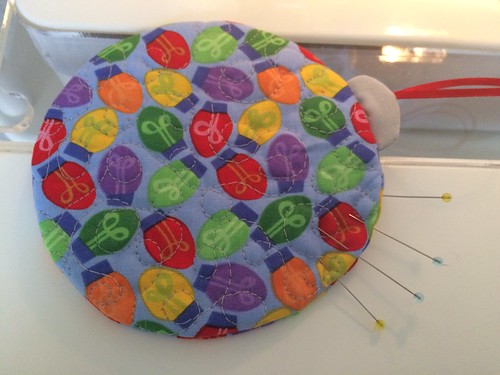
Cut your ribbon to about 4.5 inches long and place it between your two cap pieces. Sew around the perimeter using 1/4 inch seam allowance (included in pattern) leaving the bottom open. Notch the curve and flip right side out.
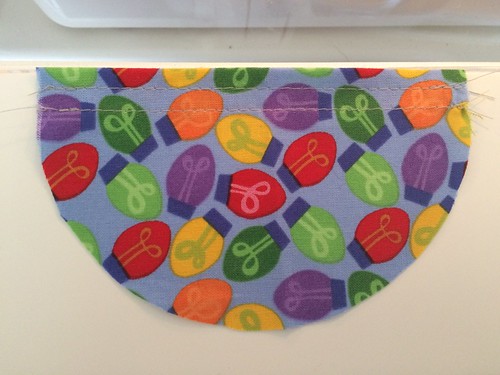
Fold the pocket piece at the top along the fold line and press down. Stitch it in place for a nice clean top.
The cap, pocket, and back piece are made the same no matter which design you choose. If you want to do either the pineapple or log cabin fronts, you will need your printout and a basic knowledge of paper piecing.
There are a zillion good tutorials out there on how to paper piece if you need one. My personal favorite is this video provided by connecting threads.
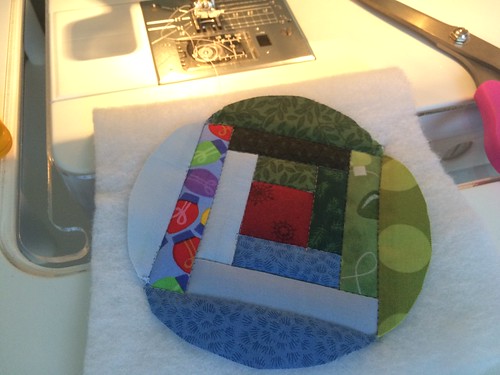
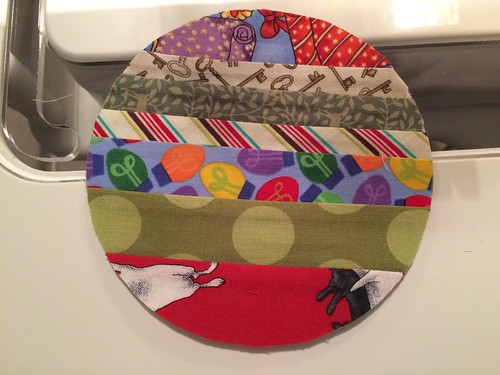
The log cabin is the faster and easier patchwork front.
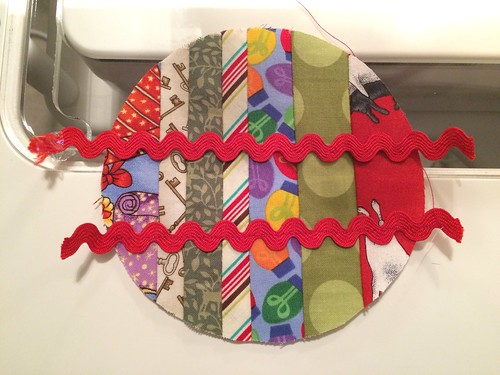
If you just want to wing the front patchwork, you could easily just piece random strips together
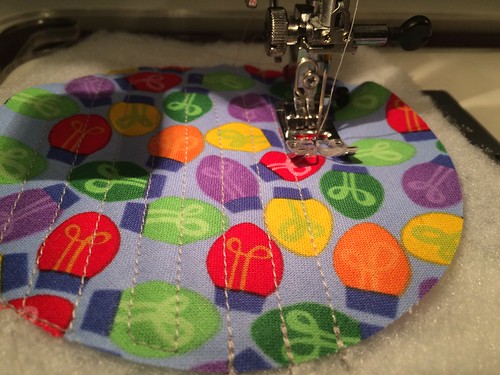
Place the font body piece (either patchwork or plain) right side up on the batting. Quilt the top using whatever design you prefer, and then trim off the excess batting.
There are a zillion good tutorials out there on how to paper piece if you need one. My personal favorite is this video provided by connecting threads.
The log cabin is the faster and easier patchwork front.
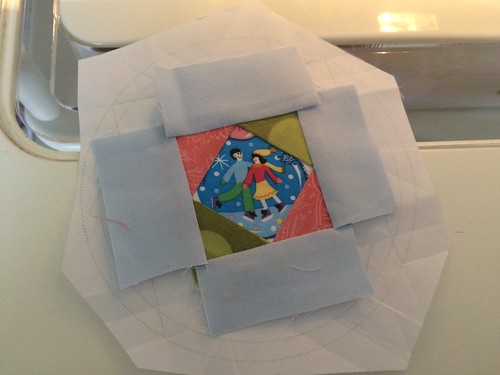
The pineapple patch is also very pretty, but more time consuming than the log cabin. It also lends itself very well to showing off a special fussy cut center.
If you just want to wing the front patchwork, you could easily just piece random strips together
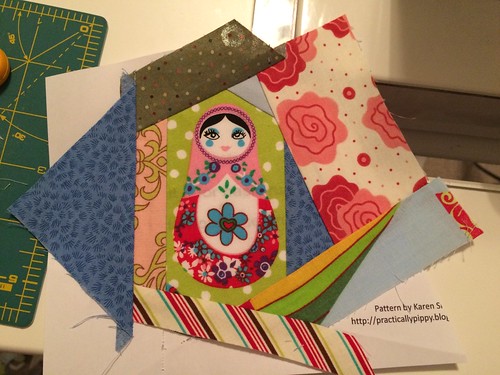
or, you could go crazy and sew pieces around a central fussy cut motif. The possibilities are really endless. . .
Place the font body piece (either patchwork or plain) right side up on the batting. Quilt the top using whatever design you prefer, and then trim off the excess batting.
If you want to add any trim to the front, now would be the time to sew it down.
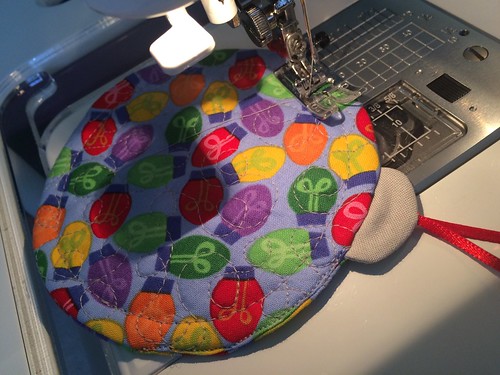
Stack the front and back pieces right sides together with the pocket and cap in-between as shown.
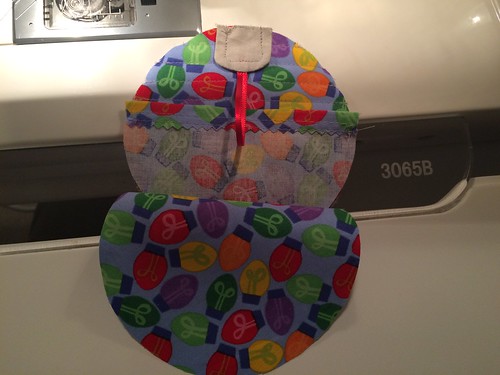
Sew around the perimeter using 1/4 inch seam allowance. Leave a minimum half inch gap un-sewn in order to flip it right-side-out (place the opening between the pocket and the cap in order to making closing it easier later).
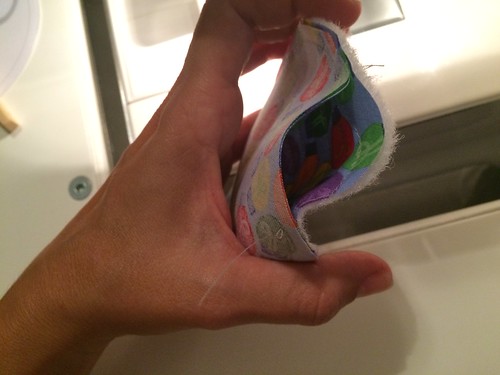
Notch around the circle and then invert the body.
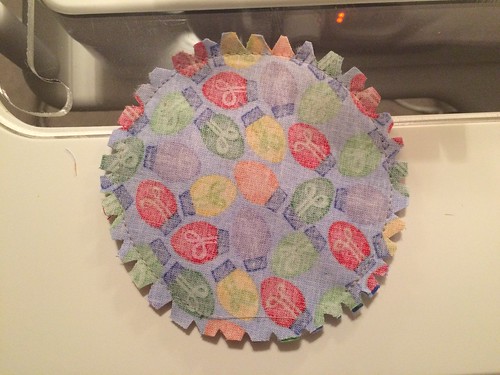
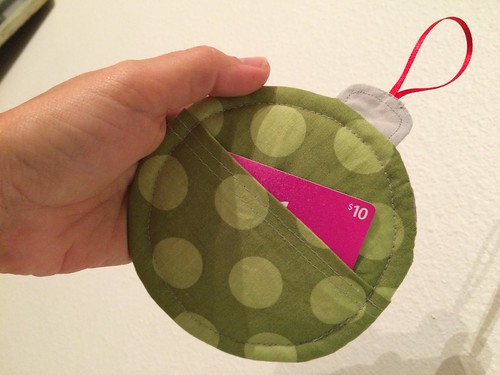
Lastly, you'll want to stitch around the perimeter again using a 1/4 inch seam allowance. This will help keep all the layers together and make the pocket more secure.
Now your ready to place your gift card in your holder . . .
and send it out into a world full of beverages . . .
that are waiting for mug rugs :)
Now it's time for you to link up and show us all what you've been up to this month! Plus, you'll get a chance to win the Skinny Dips bundle from Plush Addict.
I can't wait to see all of your holiday creations and, as always, a big thank you to all of our lovely giveaway sponsors.

  |
http://www.patchworkelephant.com/  |
I think this is one of the best gift card holders I have seen, Karen. I love that it serves a purpose afterwards. Pinning the tutorial.
ReplyDeleteThese are fab, I'm pinning the idea too!
ReplyDeleteBrilliant idea Karen, and awesome fussy cutting too!
ReplyDeleteWhat a fun way to give a gift card! Thanks for the tutorial and the patterns.
ReplyDeleteGreat idea and nice variety!
ReplyDeleteThank you!
ReplyDeleteI agree with Pam - those ARE the best gift card holders I've seen - I just love the designs! And they're multi-purpose, too - win/win :D
ReplyDeleteThis is such a great make, even aside from the gift card holder part, I love the idea of popping in a couple of goodies and hanging them on the tree. Perfect Christmas make. I clearly needed an extra day in the month this month to get linked up. I've just not quite got there over the last week, and tonight I thought I'd stay up late and finish writing my post to squeak in at the last minute, but my internet has been incredibly slow and it took ages to get photos up so by the time I hit the 'publish' button it was slightly after midnight when I'm guessing the linky closed :(. 30 day months don't work for me! But at least it's still getting me organised with my Christmas making!
ReplyDelete